Netflix’s latest episode of the series Black Mirror, Bandersnatch contains a fair share of easter eggs. One of them exposes a link to the fictional Tuckersoft website where users can download a copy of the ZX Spectrum game Nohzdyve, from the movie.
The game requires a ZX Spectrum emulator. Fortunately, QAOP is an emulator that runs in the browser. So we can run the game through that, super simple. Here’s how.
I’ve recently found that code-related tutorials and discussions provide far better background sound while programming than the music I used to listen to.
Enter the “Soothing Sounds of Coding” playlist:
That’s a YouTube playlist of coding tutorials, discussions, reviews, etc. Basically, anything code related and spanning the gamut of tech from assembly language coding on Commodore 64 to music programming using Pure Data.
EmacsRocks provides the base experience I was looking for. The levels are nicely balanced (no sharp drops or harsh clipping), pacing and vocals are generally relaxed and keyboard sounds exist in abundance. The rest of the playlist is an attempt to follow suit; code-related content with balanced audio that works great for background sound.
Why?
There are a few benefits I saw to this:
Very relaxing aesthetic to program to since it’s all programming related.
Code related content can provide a way to learn something new while coding.
Draws attention to lesser known channels with good content.
I hope others find it as helpful as I do. Feel free to share your thoughts in comments. Cheers!
There is no best font. There’s only what works best for you. For a great many developers, Operator Mono is the best font. It’s a commercial font, well worth the money.
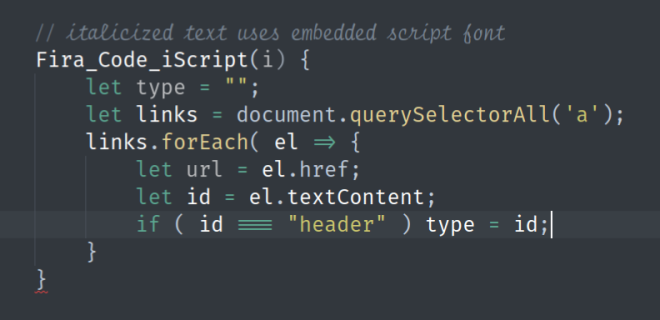
For those who lack the funds, Fira Code iScript is the best alternative (as of 2018). It supports the same programming ligatures and embeds Script12 for italicized text.
Atom is a beast of a text editor. It was all the rage in the text editing world prior to Microsoft’s release of VS Code, which just like Atom, is built on Electron. The two editors are very similar, but VS Code is clearly faster and arguably uses better defaults. On the upside though, visual elements in Atom can be fully customized using CSS. Given that, it’s the best text editor for experimenting with next generation visuals. That’s what this post is about.
Only with Atom
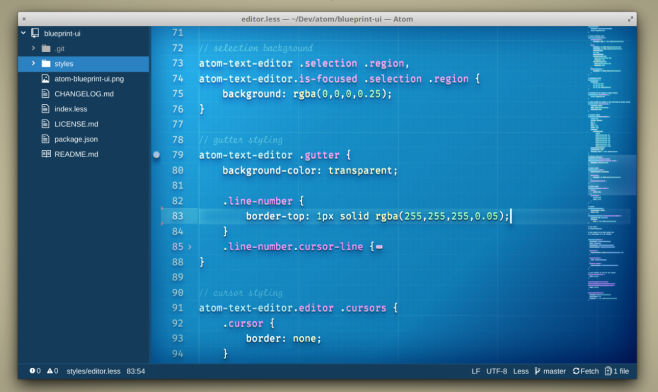
Atom’s reliance on HTML/CSS make it possible to do things no other editor can do. Like this:
That’s my recently published Notebook UI theme. It makes extensive use of gradients, blend modes and background images; only feasible using CSS. It’s heavy on the CPU but makes text editing feel a little like gaming.
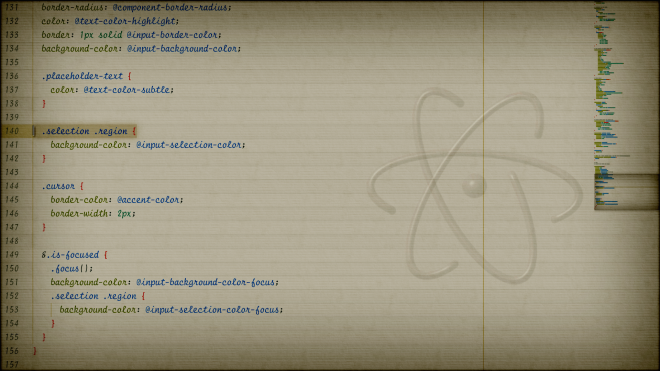
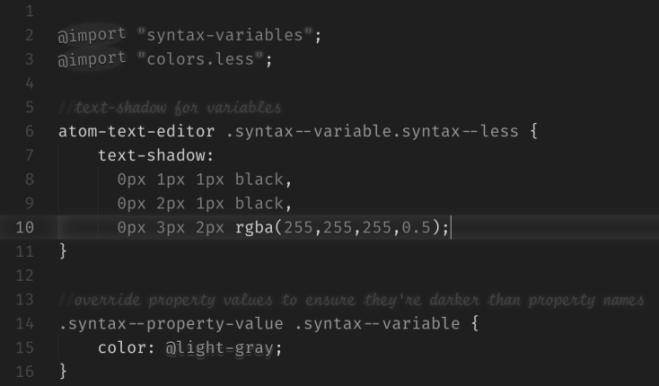
Then there’s this:
That’s Blueprint UI which uses subtle text-shadows to emphases code elements while comments without shadows blend comfortably in the background.
And on a bit more of a practical note, there’s this:
That’s Monotony Syntax theme, which uses subtle rotations to highlight simple but common keywords while somewhat blurring comments to keep attention on code elements.
Experimenting toward a better experience
Given the use of rather heavy CSS styling, those themes may not be the most practical. On older computers, they might be unusable. Even gaming notebooks might get a fair bit of unwanted battery drain as well. However, they’re great for experimenting to see if there’s an experience that might actually work better for programmers or data scientists.
As an example, Notebook UI works just fine alongside the Hydrogen extension for Atom. Since it looks like a notebook and Hydrogen was inspired by Jupyter notebooks, the combination feels natural.
On a very fun note, Gradient Syntax Theme adds a bit of CSS animation with gradients:
I’m also assembling a UI theme to simplify use of SVG filters, tentatively named Wireframe UI. It aims to bundle in the beautiful SVG filters from Inkscape and provide the simplest example for anyone to make use of them.
More possibilities exist.
Pressing Concerns
Both Electron and Atom were made by GitHub. Since Microsoft announced its purchase of GitHub and especially considering Microsoft already develops and maintains VS Code, Atom’s future seems uncertain.
We’ll see how that goes but meanwhile, we can still use Atom as the best platform for experimenting with visual designs for the next generation of text editing.
VS Code doesn’t currently provide a built-in way to convert cases like snake_case, camelCase or TitleCase. Here’s a keyboard focused workflow to handle snake_case to camelCase conversion:
Convert snake_case to camelCase in VS Code
Press CTRL-H ( ⌥⌘F on Mac ).
Press ALT-R ( ⌥⌘R on Mac ).
Type _([a-zA-Z]).
Press TAB and type $1.
Press ALT-ENTER ( ⌥ENTER on Mac ).
Press F1 and type upper, then press ENTER.
Press CTRL-ALT-ENTER ( ⌥ENTER on Mac ).
Explanation
VS Code (and Atom) currently use JavaScript-style regular expressions for the find/replace feature so the replace operation doesn’t support switches that are available in other editors like Vim (example: \u\1) or Sublime Text (example: $1-\L$1\E).
I began one of my web apps using snake_case for class and function names. It turns out, a lot of JavaScript apps and tool-kits use camelCase and I wanted other users to feel comfortable using the app alongside those. So I wanted to convert cases. In editors like Vim or Sublime Text, it’s super easy. I’d been using VS Code, which required a workaround, resulting in the workflow above.
In that discussion, user @jpike88 provides an alternative explanation that follows the same line of thought. The difference is just that the workflow I posted focuses on key-presses, no mouse interaction needed. I thought Vim users might find that more natural. Either way, I think both explanations work together to help get the workflow idea across.
Hyper.is is a terminal built on web technologies, namely Electron. As such, it can be customized using CSS. Here’s a screenshot of Hyper with scanlines, made possible through CSS:
And here’s the config file for that:
This file contains bidirectional Unicode text that may be interpreted or compiled differently than what appears below. To review, open the file in an editor that reveals hidden Unicode characters. Learn more about bidirectional Unicode characters
Krita is a stunning, open-source drawing and image editing application that works a lot like Photoshop. Til recently, it hasn’t been available out-of-the-box for Elementary OS. There were certain dependency requirements that couldn’t be met by default, but that’s now been addressed with AppImage!
All you need to do to run Krita on Elementary OS now is download the AppImage file (mentioned in the above article), set the properties so it’s executable, then run it. Dead simple!
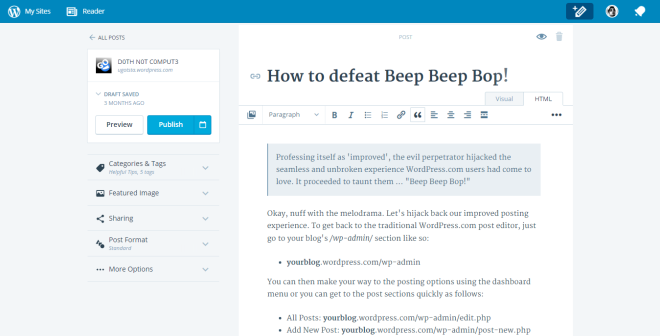
Professing itself as ‘improved’, the evil perpetrator hijacked the seamless and unbroken experience WordPress.com users had come to love. It proceeded to taunt them … “Beep Beep Bop!”
Okay, nuff with the melodrama. Let’s hijack back our improved posting experience. To get back to the traditional WordPress.com post editor, just go to your blog’s /wp-admin/ section like so:
yourblog.wordpress.com/wp-admin
You can then make your way to the posting options using the dashboard menu or you can get to the post sections quickly as follows:
All Posts: yourblog.wordpress.com/wp-admin/edit.php
Add New Post: yourblog.wordpress.com/wp-admin/post-new.php
A little clarification
In case the above is confusing, I’m referring to the ‘improved posting experience’ here on WordPress.com.
The ‘improved posting experience’.
Here’s how it used to look.
The experience from days of yore.
For those accustomed with the traditional editor, there’s really nothing to gain from the new editor, but there’s a new interface to come to grips with. There’s also a huge loss in that it’s not easy to navigate to other admin sections.
Requests for the traditional editor
It’s possible to access the traditional editor, using the details above. But it seems it won’t be the default anymore, at least from what I understand of this support topic:
So for those preferring the traditional post editor, the method outlined above is the way to go. For now, it seems Beep Beep Bop is invincible. But we can sneak our way past his evil grasp.
I ensure the material on this site is safe from malicious practices like that, but it’s a good thing to keep an eye when pasting content into your terminal.
Here’s a quick guide to editing GitHub Pages. Not familiar with GitHub Pages? It’s a totally free service provided by GitHub where you can freely host HTML pages. Read more about it here: https://pages.github.com/
The Details
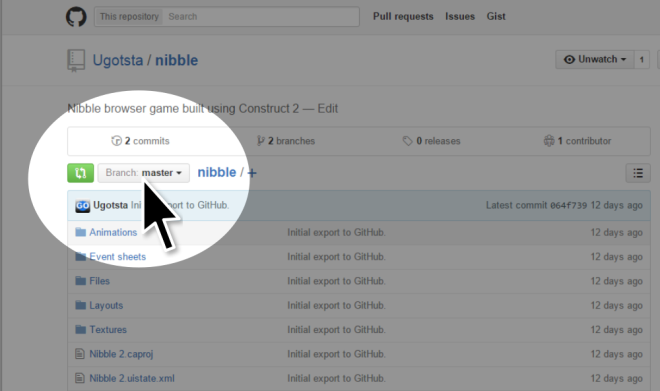
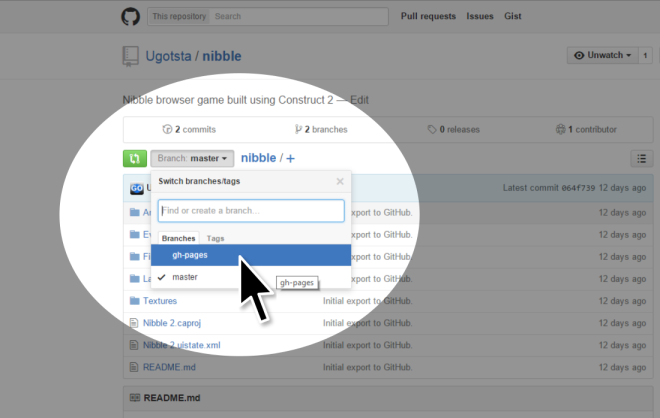
GitHub uses a separate branch for those pages so you can access the gh-pages branch like so:
In your GitHub repo, click to open the Branches drop-down.
Select gh-pages.
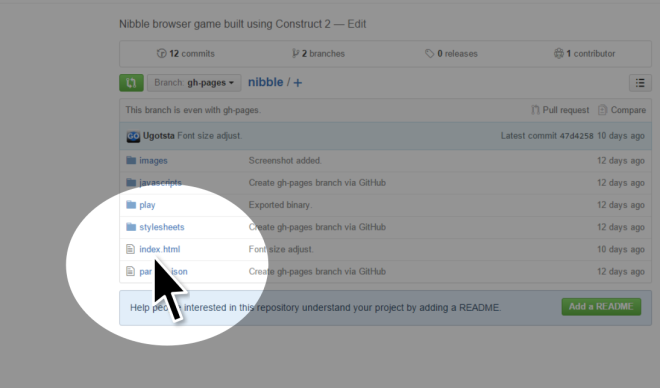
You’ll be switched over to the gh-pages branch, where you should see the files served publicly such as the index.html file.
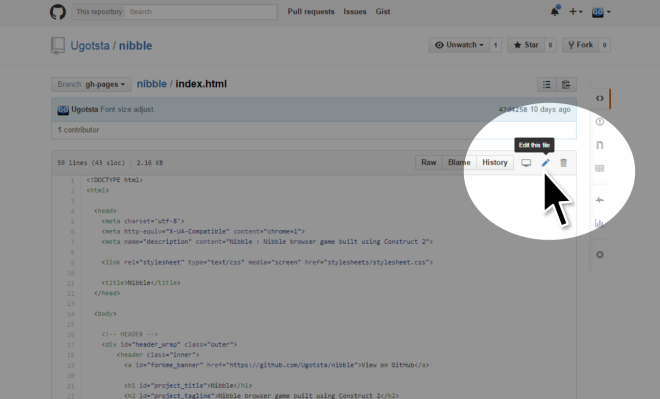
Click on the index.html file to open it, then click Edit (pencil) icon to make changes.
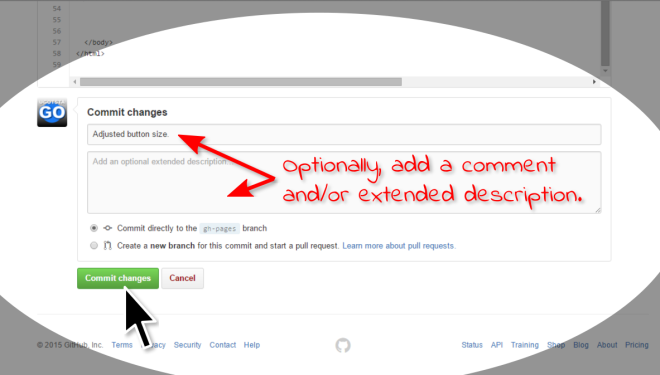
Once you’re done with editing, scroll to the bottom of the page and you’ll see a Commit changes button. To save the changes, press that button and optionally leave a comment about the changes.
That’s it!
You should see the change(s) reflected when viewing the page in your browser, through the page’s github.io url (or via a custom domain if you’ve set configured that).
The command-line method
Of course, if you’re more comfortable editing through your command-line or linux terminal, it’s very simple. If you haven’t already, clone your repo locally. For example, you can clone my Nibble project like so:
git clone https://github.com/Ugotsta/nibble.git
Once that’s cloned, go to the project folder:
cd nibble
Then access the gh-pages branch using the git-checkout command like so:
git checkout gh-pages
You’ll then be able to see and edit the files from the gh-pages branch. You can make your changes to the index.html file, like so (using Vim) for example:
vim index.html
You can make the changes to the file, then add those files as part of a commit using git add: